|
Prepare
to Fly |
Back to Article Index
Radio
Control Model World - Feb '95
by
STAN YEO
INTRODUCTION
All
too often over the years I have seen modellers arrive at the flying
site full of enthusiasm with a new, untried, model only to depart
a few minutes later in bitter disappointment. Post-mortems reveal
three main reasons for the failures.
1.
Full pre-flight checks were not carried out prior to leaving home.
2.
The conditions / site were unsuitable for the model.
3.
The modeller did not have the experience necessary to fly the model
on that occasion.
The
purpose of this article is to provide a simple checklist / advice
on navigating your way from building board to successful maiden
flight with the minimum of aggravation. The article is geared towards
slope soaring simply because it is my specialisation but the majority
of the advice is applicable to all forms of fixed wing radio control
flying.
PREPARING
FOR FLIGHT
This
is the last phase of the building operation and probably the most
important. If the model is not correctly set-up it WILL NOT fly
properly and, will in all probability, be more difficult to fly.
Included in this phase of construction is the installation of the
radio equipment. Servos should be mounted securely on balsa bearers
or if you prefer non-flexible self adhesive tape. Controls should
be connected as per the plan with full and free movement. Bowden
cables should be supported every 10cms, avoiding sharp bends and
with the minimum of slack. The Receiver battery should be installed
as far forward as possible so that it does the minimum of damage
in a crash and reduces the nose weight required to get the Balance
Point correct. If you are in any doubt as to how to install the
radio equipment or set up the controls etc. please seek advice from
a more experienced modeller or purchase and read a radio control
primer book.
When
hinging the ailerons seal the gap with trimmed down 6mm sq. soft
self adhesive Draft Excluder, available from most D.I.Y. stores.
Sealing the ailerons makes a considerable difference to both the
performance of the wing and the response of the ailerons. Fit the
hinges to the rear spar before fitting the Draft Excluder. Use a
new scalpel blade to trim the down to size.Below is a list
of some of the items that should be checked as part of your pre-flight
preparation:
1.
Check wing for warps (see notes below).
2.
Check the wings and tailplane are at the correct angle (incidence)
to each other and the fuselage.
3.
Check the controls operate in the correct sense i.e. moving the
Rudder control to the Right moves the Rudder to the Right, Down
Elevator moves the Elevator Down and Right Aileron moves the Right
Aileron Up.
4.
With the trim in neutral, the servos and the control surfaces should
also be in neutral.
5.
Check the range of movement of the control surfaces agrees with
the plan.
6.
Balance the wings (spanwise) by adding weight to the tips as required.
7.
The position of the 'Balance Point' (Centre of Gravity). Point'
(CofG) is as shown on the plan or slightly forward but NOT aft.
Mark where it should be on the underside of the wing with a 'permanent'
pen.
8.
Check structural integrity i.e. everything is securely attached.
9.
Range check the installed radio equipment. In the absence of specific
instructions expect a range in excess of 100 metres with approximately
150mm of aerial extended.
WARP
REMOVAL
If
the wing has a warp (twist) it must be removed before the model
is flown. With a built-up wing this is best achieved by pinning
the wing to your building board with a small amount of warp in the
opposite direction. The covering is then, either softened using
a thin coat of dope if it is a doped finish, or is re-shrunk to
it's new position if it is covered in heat shrink film. The wing
is then left to settle for a few days before removing from the building
board. The procedure is similar for a foam veneer wing except that
a cradle is built to accept the warped wing panel. Set the anti-warp
component to approximately the amount of warp you wish to remove.
Thoroughly heat the wing using a heat gun. Get the wing as hot as
you dare without damaging the wing or covering. Once again
leave to settle for a few days before removing from the jig. If
the above is not successful try again but this time increase the
anti-warp factor. My experience is most wings are recoverable.
BALANCING
Balancing
the wing is one of the last operations that should be carried out
on the model prior to flying. The method I use is to insert a Map
Pin into the wing leading and trailing edges at the wing centre.
The wing is then suspended by these pins and weight is added to
the wing tip of the high wing until it balances. This weight is
then 'buried' in the wing tip and the finish restored.
After
balancing the wing the model must be balanced. A rough balance point
can be found by balancing the model, on your fingers, under the
wing near the wing root. For a more accurate method make a simple
balancing cradle (see diagram) to support the model. Mark the position
of the Balance Point on the wing, at the root, either side of the
fuselage. Suspend the model in the cradle with the cradle pivot
aligned with the balance point marks. Add weight to the nose or
tail as required until the model is balanced with a slight nose
down attitude.
TEST
FLYING
Unless
you have experience with a similar or higher performance model to
the one you are about to test fly I strongly recommend that you
seek the help of someone who has the necessary experience. This
particularly applies to ab initio pilots and those graduating
to an aileron model for the first time. Newcomers to Slope Soaring
will find it very difficult at first. The chances of an inexperienced
pilot test flying a new model successfully are poor. I know because
I learnt that way, not through pig headedness but through a lack
of experienced slope pilots (it was in the mid sixties!).
When
you are ready to test fly your model ensure that the radio equipment
is fully charged and serviceable. Wait for a day when the weather
is suitable (how many times have you been told that?). Do not be
tempted to test fly your new model in marginal conditions. It is
a recipe for disaster. If you are a newcomer to radio control flying
please establish contact with the local model flying club that specialises
in gliding / slope soaring. Find out as much as you can about the
local slopes i.e. the most suitable wind strengths and directions
and perhaps, more importantly, take out third party insurance before
you fly (BMFA and ASP Insurance are both sufficient and reasonably
priced, see modelling magazines for details).
On
the day of the test flight take your current model along and fly
that FIRST to get yourself attuned both to flying and the conditions.
If you need a more experienced modeller to test fly your model insist
that he/she has a flight with their own model first for the same
reasons. Carry out the usual pre-flight checks i.e. the model is
correctly assembled, your frequency is clear before switching on
your transmitter, all controls are connected and operate in the
CORRECT sense and trims are neutral (the controls should have been
set up with the trims in neutral). Ask a competent modeller to launch
the model for you just in case a panic response is required immediately
the model is launched. Finally before launching the model check
the whereabouts of other flyers' models. Launch the model gently
but firmly into wind with a slightly nose down attitude. Do NOT
give it a tremendous 'heave'. It is not necessary. It will only
cause the model to climb violently, due to the excess airspeed,
and stall into the ground unless you are lucky enough to recover
in time. If the model has been properly built and prepared it should
fly 'straight off the board' as they say with the minimum of trim
adjustments. Be prepared for different flying characteristics and
if you are moving up to a higher performance model be prepared for
an increase in flying speed and control response. Take care when
slowing the model up, particularly near the slope just in case it
enters a spin. Get to know the model by trying out different manoeuvres
but please allow a greater safety margin just in case things do
not work out as you intended.
TRIMMING
FOR PERFORMANCE
The
control set-ups given on the plans are often conservative. The reason
is that two conflicting groups of flyers have to be catered for,
namely the inexperienced and the experienced. Consequently control
responses are often set mid range and can be changed a small amount
if desired. Despite meticulous setting up it is still possible that
the model will require further trim adjustments. This could be for
a number of reasons i.e. prevailing weather conditions, flying site
constraints or simply personal preference. If the model does require
further adjustments only make one adjustment at a time and keep
notes for future reference. Below are a few notes to help with the
adjustment of the Balance Point. The model will not necessarily
exhibit all the symptoms mentioned.
Centre
of Gravity too far forward.
1.
Requires excessive up trim
2.
Flies faster than normal or expectation.
3.
Prone to diving.
4.
Sluggish elevator response.
5.
Requires a lot of up elevator when flying inverted.
6.
Reluctant to spin.
7.
Restricted aerobatic performance.
Centre
of Gravity too far Back
1.
Requires excessive down trim.
2.
Model gets 'blown back' easily (poor penetration).
3.
Unstable in pitch i.e. cannot find suitable elevator trim position.
4.
Prone to diving (result of a flat stall).
5.
Twitchy elevator response.
6.
Has a tendency to enter a spin when slowed down in a turn.
It
is imperative that the elevator control is set-up correctly as an
over / under sensitive elevator can make flying the model very difficult.
Too much elevator movement can result in the tailplane being stalled
during aerobatics. A tailplane stall often manifests itself as a
flick roll in the pull up for a loop or a slow roll at the bottom
of a bunt on the application of more down elevator. Both can be
very disturbing if you are not expecting it.
LANDINGS
Landing
is the most difficult manoeuvre in slope soaring and requires alot
of simulated practise plus good basic flying skills. If you are
inexperienced ask an experienced flyer to land your model for you.
If you are going to land yourself PLAN your circuit. Think about
what you will do if the model is HIGH or LOW in the circuit. Start
your circuit with the model in the RIGHT place and DO NOT go back
behind the hill (you can always go around again). Practice imaginary
landings in front of the slope before committing yourself to a landing,
you may find the model (or is it the pilot?) behaves differently
when close to the ground! Familiarise yourself with the model's
behaviour when close to the stall and learn to recognise the symptoms
that precede a stall or spin. The more you know about the model's
flying characteristics the more confidence you will have and the
better the chance of making a safe landing. Landing with reduced
control responses i.e. with rates selected, may help to overcome
the tendency to over control in pressure situations. Also if it
is a basic trainer type model a small amount of down trim will not
only increase the speed slightly and reduce the risk of stalling
but it will also reduce the buffeting caused by the turbulence close
to the ground. Landing and landing techniques is a complete article
in itself and has been covered in the July '94 issue of RCMW.
SUMMARY
In
a short article like this it is only possible to take a cursory
look at the topics covered. Most paragraph headings could be expanded
into complete articles if supporting theory is added. In my travels
around the country visiting model flying clubs, delivering talks
on various aspects of modelling, it is my experience that few modellers
are interested in the nitty gritty theory. The majority rely heavily
on trial and error and just want to know the basics needed to get
the optimum performance from their models hence the abscence of
theorems in my articles.
Required
To Support The Article
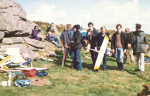
1.
Photographs of typical slope soarers models.
2.
Diagram of balancing Jig.
3.
Wind flow over a hill. (copy from previous article).
|
Back to top
|