|
 About Us
Read
about PMP's history and philosophies
What We Sell
View a full listing of products sold by PMP
Shopping at PMP
An
overview of shopping at PMP
Newsletters
Come Visit Us
We
are always happy for modellers to drop in and shop. Here are directions,
give us a call to let us know you're coming.
Agents/Suppliers for:-
|
|
Eppi
- SOAR
78in (2
metre) EPP Crash Resistant Thermal / Light Wind Slope Soarer
Designed
by Stan Yeo
Produced
by PHOENIX MODEL PRODUCTS
Introduction
The Eppi-SOAR
is a stylish 78in span EEP crash resistant flat field thermal soarer /
light wind slope soarer designed for the modeller wanting to combine EPP
durability with rigid structure performance. Eppi-SOAR makes an excellent
basic trainer as it will fly off the slope in the lightest of winds and
yet still cope with the stronger winds when other more lightly built models
have been put away. It can also been flown from a flat field using a Hi-Start
or Bungee to get the model airborne. Eppi-SOAR is capable of a wide range
of rudder elevator aerobatics such as loops, barrel rolls and inverted
flight in good conditions off the slope. Spins are another of Eppi-SOAR's
specialities, being easy to enter and easy to exit. As with all EPP models
building time has been kept to a minimum, typically 8 -12 hrs depending
on the skill and care taken. Field repairs if required are of the Elastoplast
variety!
Tools
/ Materials Required
The only
tools required are a modelling knife with spare blades, a pair of sharp
scissors, soldering iron, 180 grade Wet & Dry sanding block, a can of
impact spray adhesive such as Stikatak, some runny super glue (please
observe safety precautions on packets!), epoxy and a soldering iron.
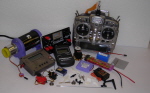
R/C
Equipment
The R/C Equipment
used in the prototypes consisted of two standard size servos (HS300) for
the rudder and elevator, a standard AA size Rx battery and a 4/5 channel
receiver (Hitec / GWS). All the items are available from PMP at competitive
prices.
Building
the Fuselage
- Lightly sand the fuselage sides, top and bottom with 180 grade wet
and dry to remove the 'release' agent. Remove dust with a small brush
or vacuum cleaner.
- Drill wing dowel holes in fuselage sides and fit fuselage nose &
tail doublers using spray impact adhesive
- Fit distance pieces and nose former to one fuselage side. 3. Using
thin superglue fit 4.5mm sq. strip, tail post and triangular nose strip
to fuselage. Check you have a left and right side!
- Join fuselage sides together over plan ensuring fuselage is straight.
Cut nose top to length and fit.
- Cut fuselage top to length and glue in position.
- Fit elevator and rudder servos to balsa bearers and determine which
side of servo the elevator pushrod needs to be for the elevator to operate
in the correct sense! Position servos inside fuselage (Do not glue).
- Drill holes for the elevator control rod in fuselage sides 120mm
forward of the back of fuselage (see plan). Shamfer side of holes to
reduce control rod exit angles. Note: It is important that the control
rods are kept as straight as possible to avoid binding. If they do bind
replace with 20swg piano wire and stiffen with off-cut at exit. Clean
with white spirit.
- Fit fuselage top and tailplane seat. Drill hole for rudder control
rod just in front of tailplane seat. Reduce exit angle as much as possible
to reduce control rod binding.
- Fit control cable outers (with inners inserted) and attach to fuselage
sides using CW Tape or balsa blocks. Watch for control rod binding.
- Fit fuselage bottom and trim to length. Reinforce corner joints with
25 mm wide strips of CW Tape.
- Spray the fuselage and EPP sides with spray adhesive. Hold nozzle
40-50 mm from work when spraying so that solvent does not have time
to evaporate before adhesive contacts works.
- Allow a few minutes for solvent to evaporate. Fit EPP sides and trim
flush with top and bottom of ply box. Do NOT trim in front of nose former,
this area will form a cavity later to house the nose weight. The EPP
is best trimmed using s long bladed (X-Acto or similar) knife using
the fuselage top & bottom as a guide.
- Cut hinges in Fin and tailplane. Mark centre-line of tailplane and
fit Fin using 10mm triangular strips of balsa either side of fin base.
- Fit tailplane assembly using spray adhesive. Ensure that it is square.
- Fit the EPP fuselage bottom as before and trim the EPP again using
fuselage side as knife guide.
- Fit EPP fuselage top (Front & Back). Relieve top underside around
Fin base to accommodate triangular balsa strips. Round fuselage corners.
- Glue 120 grams or 4 ozs. of lead to front of nose former in cavity
formed by EPP sides. Fit nose block and shape fuselage i.e. round corners
using sharp knife and 180 grade wet & Dry (use dry!).
- Make hatch, shape and cover with CW tape.
- Cover fuselage with CW tape (lengthwise). Lay first strips along
fuselage sides aligned with bottom of tailplane. Overlap each strip
by 6 - 10 mm or 1/4 to 318 inch. In high stress areas such the under
the wing leading and trailing edges apply an extra layer of tape for
added strength. Cover CW tape with coloured vinyl to decorate model
and protect CW tape from the effects Ultra Violet light.
Building
the Wings.
The only
UK manufacturer of EPP, suitable for modelling, has ceased trading and
we are currently not aware of another UK / EU source. To maintain production
of our EPP kits we stockpiled the material before they closed down. Unfortunately
some of it is of variable quality and some wings cut using our two CNC
machines have more than the usual amount of surface blemishes. We apologise
for this and assure you that ALL wings are individually check before packing
to ensure that the blemishes will not have an adverse effect on the performance
of the model.
- Lightly sand wing surfaces and remove dust as before. Remove waste
from wing brace slots.
- Fit 1mm plastic trailing edge reinforcing strips using spray adhesive.
Coat both surfaces and allow solvent to evaporate before sticking together.
- Laminate 4off 1.5mm ply centre braces using Superglue. Epoxy wing
wing main spar and epoxy wing joiner tubes in position.
- Laminate 2 x 1.5mm wing tip spars as before.
- Join wing-halves to main spars using epoxy. Place on a flat surface.
Use masking tape and books to hold wing in position / together while
epoxy sets. Take care to keep spar slot clean of epoxy where tip panel
spars are attached to centre panel main-spar.
- Join tip panels to centre panel ensuring the tip panel is at the
correct dihedral angle. Note leading edges should form a straight line
i.e. not be swept back or forward. Shape wing tips.
- Drill holes in ply end ribs to accept wing joiner / hardwood dowel
wing locating lugs. Epoxy ribs in position. Hold in place with masking
tape whilst epoxy sets.
- Spray wing with spray adhesive and cover wing with GW tape. Start
by laying strip along TE. Then work forward overlapping the previous
strip by 6-10mm. At the leading edge trim tape as you would if covering
in film but overlapping top and bottom by 10mm. Cover top surface of
wing with coloured vinyl tape I lightweight Fablon or iron on film.
This serves two purposes, one to decorate model, the second to reduce
the effects of ultra violet light on the CW tape.
- Using scrap wing sleeving manufacture wing fairing, cover and double
side tape to one wing panel.
Flying
- Set the
controls to give the following movements for initial flights: Elevators
+/- 8 mm Rudder +/- 25 mm Balance Point 70mm +/- 5mm from LE. Prototypes
required 120 - 150 grams (4 to 5 ozs) nose weight.
- Laterally
balance wing and check that it is not twisted. If the wing is twisted,
twist back in the required direction and re-smooth covering tape in
position with a warm iron.
- If you
are new to the hobby and inexperienced it is strongly recommended that
you make contact with an experienced modeller to trim the model and
give you some basic flying instruction. It is also strongly recommended
that you take out third party insurance. This can be arranged by telephone
through the BMFA (British Model Flying Association) on 0116 2440028.
- With
Rudder Elevator only control the model does not respond instantly to
a control input. This means that any manoeuvre must be planned in advanced.
Also when the model starts to respond to the control input the rudder
control must be slowly returned towards the neutral to prevent the turn
becoming a spiral dive. If you want the model to turn tightly then up
elevator must be used to keep the fuselage level (see Prepare to Survive
article on our website phoenixmp.com).
- If using
a hi-start or bungee to launch the model use either 6mm (1/4 inch) square
catapult elastic or 8mm dia. surgical tube. The minimum length should
be 30 metres with at least 4 times the bungee's length of 25 - 30 kg
(65lb) breaking strain mono-filament nylon fishing line attached along
with a parachute to keep the line straight as it falls to the ground
after the launch. Initially the bungee or hi-start is tensioned to at
least 2 times the length of the rubber. When launching the model hold
it at a 30 degree angle give it a solid push when letting go to assist
the bungee accelerate the model to flying speed. Do not pull in up elevator
at this stage as it will cause the model to stall off the line with
disastrous results. If the model fails to climb i.e. gets pulled along
by the bungee with its nose in the air, put the nose down (apply down
elevator) to regain flying speed, this will release the model from the
bungee, and land straight ahead. It is unlikely that you will have enough
height to perform a 360 degree turn. Try again but this time with more
tension on the bungee. Once you have got the model climbing satisfactorily
try feeding in a little up elevator on the climb. If the model shows
sign of not climbing or wandering on the line release the up elevator.
If the model in light to modest winds lifts a more than 20-30% of the
rubber of the ground then increase the length of nylon line. Lifting
the rubber of the ground reduces the launch height.
- When
performing aerobatics remember that the model requires energy to perform
them. If the model has insufficient speed it will fall out of the manoeuvre
or perform it half-heartedly. Vertical or near vertical dives are not
an efficient way to build up speed, 20 - 30 degree dives are much more
efficient. Avoid sudden control inputs. In most cases all they do is
scrub off speed and lose height. Try to fly smoothly with the minimum
of control input as not only do the manoeuvres look better but you will
be able to perform more of them before having to regain height. Try
stringing manoeuvres together paying particular attention to positioning.
Be creative and set yourself targets for each flying session.
- If you
are having difficulty penetrating into wind try ballasting the model
about the balance point. Avoid over-ballasting as this will degrade
performance and make the model more difficult to fly.
- Eppi-SOAR
will take a lot of punishment. It is excellent for building confidence
and will add another dimension to your flying but please remember if
you take a big enough hammer to anything it will break. The CW tape
used for covering also degrades in ultra-violet light so store the model
in a relatively cool place away from direct sunlight and do not rest
anything against the Correx tail.
- Finally
should you require further assistance or advice please contact us either
by letter, telephone, email or visit our website (http://www.phoenixmp.com)
where you will find useful information on sloping etc.
Happy flying
Stan
Yeo
Eppi-SOAR 020723
|
|