|
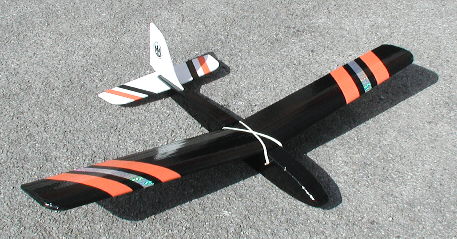
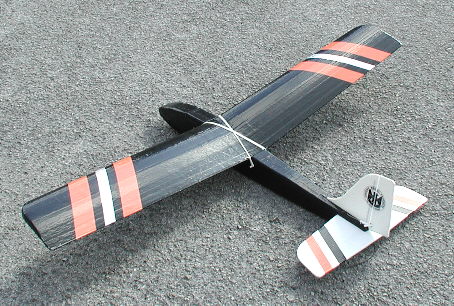
FUN-Start
Mk2
1370mm Virtually
Crash-proof Slope Soarer Trainer
Designed
by Stan Yeo
Produced
by PHOENIX MODEL PRODUCTS
Introduction
The FUN-Start
Mk2 is designed as a low cost, low risk entry into radio control model
flying. Budding modellers with no previous model flying experience can,
after a short period of instruction, rapidly become accomplished slope
pilots. The FUN-Start Mk2 is a basic trainer with all the qualities expected
of a basic trainer plus the added bonus of being virtually crash-proof.
It is the fear of crashing that puts so many people off model flying and
inhibits those that do have a go. The model should only take a few hours
to put together and be within the capabilities of most people. So before
you start please read the instructions and throw away most preconceived
ideas about model building. This is not going to be a pretty model but
it does have a certain style! The EPP foam is glued using an impact adhesive
(Bostik or Evo-Stik) except for the mainspars which are glued with Epoxy.
Whilst the model is covered using glass reinforced cross weave (CW) tape.
A bit like over-protectively wrapping a parcel! Although it is strongly
recommended that before covering the model it is coated with a spray on
adhesive such as Stikatak Superspray (a carpet adhesive) to improve adhesion
between the cross weave tape and the foam. You have been warned so relax
and enjoy the experience!
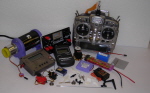
Radio
Control Equipment
If you are
starting from scratch and do not have the R/C equipment needed to fly
this model it is recommended you buy a 4 channel outfit with rechargeable
batteries and on a frequency of 35 Megahertz. We sell and recommend the
Hitec Laser 4 and the Futaba 6EXA. Both are very reliable and represent
excellent value for money. Check our website 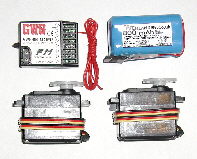 phoenixmp.com
for details on price etc. For those looking to use existing equipment
or just buy new airborne equipment the FUN-Start Mk2 requires 2 standard
size servos, a square receiver battery (not the flat one normally supplied
with the set) and preferably a 4 channel receiver on 35mHz (please read
article on website Starting Slope Soaring). phoenixmp.com
for details on price etc. For those looking to use existing equipment
or just buy new airborne equipment the FUN-Start Mk2 requires 2 standard
size servos, a square receiver battery (not the flat one normally supplied
with the set) and preferably a 4 channel receiver on 35mHz (please read
article on website Starting Slope Soaring).
Tools
& Materials Required
The only
tools required are a modelling knife with spare blades and a 180 grade
Wet & Dry sanding block. Adhesives used are Spray Impact adhesive for
'foam' joints. Two part Epoxy for the wing mainspar and Superglue (cynoacralite)
for wood to wood joints
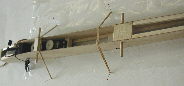
Building
the Fuselage
- Lightly sand ply fuselage side to remove splinters and release agent
used during the manufacture of the plywood. Please note it is likely
that the plywood sides will be distorted. This is unavoidable due to
the natural curvature of the wood and the technique used to cut the
parts out. If the problem is causing difficulties please contact us
for advice.
- Drill wing dowel holes in ply sides. If building trainer version
drill both sets of rear dowel holes ready for conversion to aileron
wing. Ensure a tight fit.
- Fit balsa strip longerons to ply sides using Superglue leaving gaps
for balsa blocks. Check there is a left and right side !!
- Cover plan with cling film and position fuselage sides above plan
view of fuselage, using wing dowels to assist with alignment. Position
balsa blocks. In conjunction with wing dowels use rubber bands stretched
over top of fuselage to position sides correctly. Use set square for
 final vertical alignment.
- Fit balsa block at front and rear of wing, plus block at fuselage
bottom under wing trailing edge (TE). DO NOT GLUE DOWELS, they are easier
to remove after an arrival!
- Fit nose former and join fuselage at tail. Fit ply tail seat. If
tailseat has bulged during die-cutting fit with bulge pointing inwards.
- Fit ply fuselage bottom forward of wing TE and ply top at nose, forward
of hatch.
- Spray with impact adhesive, one side of fuselage and one EPP foam
side and allow a couple of minutes for solvent to evaporate. Fit
 foam
side to fuselage ensuring that the 'spare' is at the nose end (required
to form cavity for nose weight). foam
side to fuselage ensuring that the 'spare' is at the nose end (required
to form cavity for nose weight).
- Using sharp long bladed knife trim EPP foam ensuring that it is cut
square to fuselage top and bottom. Fit other EPP fuselage side and trim
as before.
- Decide which side of the servo the control rods need to be connected
for the controls to operate in correct sense. Remember control exit
is on opposite side. Insert piano wire push rod into control outer and
fit elevator control rod checking that pushrod moves freely. Anchor
to fuselage sides in two places between wing TE and tailplane using
balsa strip off-cuts or CW tape.
- Fit fuselage bottom again ensuring any surplus is at nose end.
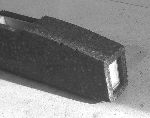
- Fit EPP to nose top forward of hatch aligning with ends of EPP sides.
- Obtain a small sheet of roofing lead (scrap yard), preferably old
lead which is pure and not an alloy which is lighter). Cut out 4 off
33mm x 38mm sq. blocks and glue to front of nose former inside EPP foam
cavity. The FunStart requires at least 100grams of nose weight due to
its design.
- Fit noseblock and trim any surplus.
- Remove 1.5mm strip of plastic from Correx Tailplane and Fin along
hinge line to form hinge (as shown on plan).
- Fit, (using superglue) 10 mm triangular strip to base of Fin to line
up with tailplane as shown on plan. Check using set square that fin
is square when resting on base. Adjust as necessary.
- Mark tailplane centre on Correx and glue Fin in position using
 Superglue ensuring it is square with the tailplane. TIP
If fin is not vertical after gluing to tailplane, cut balsa strip along
its length on inside of lean and insert sliver of thin card to correct
lean. When satisfied fix with Superglue.
Superglue ensuring it is square with the tailplane. TIP
If fin is not vertical after gluing to tailplane, cut balsa strip along
its length on inside of lean and insert sliver of thin card to correct
lean. When satisfied fix with Superglue.
- Cut fuselage top to shape above tailplane seat and relieve inside
of fin slot to accommodate 10 mm triangular strip at Fin base.
- Epoxy Tailplane to Fuselage ensuring that it is both square and in
line with the axis of the fuselage i.e. Fin has not got built-in left
or right rudder.
- Position fuselage top hot wire 'drill' hole for Rudder control rod
(use
 non - Z bend end of push rod). Only heat the last 10 mm. Drill a test
hole in scrap EPP - you will be surprised at how easy the foam melts!
non - Z bend end of push rod). Only heat the last 10 mm. Drill a test
hole in scrap EPP - you will be surprised at how easy the foam melts!
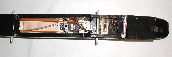
- Fit rudder control rod and check for freedom of movement as before.
- Fit fuselage top. Trim to size as before and radius all corners using
a sharp knife and 'carving' action before final finishing with 180 grade
wet & dry. Manufacture hatch.
- Cover fuselage with CW tape (lengthwise). Lay first strips along
fuselage sides aligned with bottom of tailplane. Cover CW tape with
coloured vinyl to decorate model and protect CW tape from the effects
Ultra Violet light.
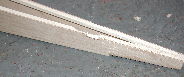
Building
the Wings
- Lightly sand wing including spar recesses with 180 grade Wet & Dry.
Check fit of spar recesses, adjust as necessary. Remove dust as
 before. Laminate the ply dihedral braces.
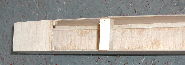
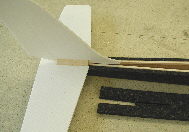
- Glue plastic trailing edge reinforcing to underside of wing trailing
edge.
- Epoxy lower wing spars in position. Place weights on wing panels
until epoxy set.
- Epoxy top spar and dihedral brace in position on one wing panel.
Weight down as before.
- Join wings ensuring they are set at the correct dihedral angle (170
-180mm). Epoxy top spar in position. Weight down as before until epoxy
set. Dihedral is important as not only it provide lateral
 stability but also helps determine the effectiveness of the rudder.
- Before covering spray model with spray adhesive such as Stikatak
Superspray or 3M Permanent Spray Mount.
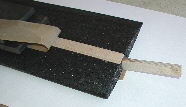
- Lay 50mm wide strip of CW tape, the length of one wing plus 75mm
wing joint overlap, on a flat surface. Place the wing trailing edge
centrally on the tape and roll over the edges onto the top and bottom
surface of the wing. Smooth into position. Check trailing edge is straight.
Do same for other wing.
- Cover bottom surface of one wing. Starting at trailing edge and overlapping
centre section by 75mm and the previous strip by 8mm. Take care not
to introduce a twist into wing but please note that the wing has washout.
Washout is where the trailing edge of the wing twists up as it goes
towards the tip. Both wings should have the same amount of twist.
- Cover the top surface of the wing in a similar manner to the bottom
( see diagram).
- The CW tape degrades in ultra violet light (sunlight) so it is recommended
that the top surface of the wing and the fuselage is covered in an opaque
thin sticky back plastic tape which we can supply in a variety of colours.
We also advise that the model is stored away from direct sunlight any
other sources of UV light i.e. fluorescent lights.
Flying
Before attempting
to fly your FUN-Start Mk2 it is strongly recommended that you make contact
with the local model flying club and take out third party insurance. This
can is easily arranged through the British Model Flying Association (BMFA)
Tel: 0116 2440028 or Model Aviators Association (MAA) Tel 01472 242391.
Learning to fly can be a fraught process and prone to the occasional mishap,
particularly if going it alone, so if at all possible get an experienced
flyer to assist you during the initial flights. Unfortunately it is not
possible within these instructions to cover all aspects of model flying
but there are a number of articles on our website (phoenixmp.com) to assist
you. Below are a few basic key points.
- Be meticulous when setting up the controls. Ensure they operate in
the correct sense i.e. up is up and down is down. Check you have the
correct amount of movement i.e. +/ 9mm for the Elevator and +/- 35mm
for Rudder).
- Make sure the model balances at the correct point (despite the lead
built into the nose it may still require more weight). Failure to balance
the model correctly could make it almost impossible to fly. The FUN-Start
Mk2 will require several ounces of lead in the nose. This is normal
and helps to make the model more stable and able to fly in stronger
winds. In very strong winds it may be necessary to move the balance
point further forward of that shown on the plan.
- Lift to keep the model airborne is generated by the upward deflection
of the wind when it meets the face of the hill. No wind no lift!
- Gently launch the model into wind in a slightly nose-down attitude.
Do not give it a good chuck!
- Initially make all turns into wind. Do NOT turn towards the hill.
- Remember that when the model is flying towards you the rudder control
is reversed i.e. left rudder causes the model to turn to YOUR right.
- When turning, as soon as the rudder starts to turn the model allow
the control to return to neutral. Holding the rudder on during a turn
will cause the model to enter a spiral dive.
- Keep the fuselage level during the turn by using a small amount of
up elevator. This prevents a build-up of speed during the turn. Any
excess speed results in a zoom climb on exit from the turn.
- Before attempting aerobatics build up speed in a SHALLOW dive (20
- 30 degrees) otherwise the model will fail to complete the manoeuvre.
- With the FUN-Start Mk2 it may be necessary to add NOSE ballast in
windy conditions to assist with penetration and make the model more
stable.
- Always think SAFETY. Do not fly near overhead electricity cables,
close to busy roads or where the public are frequently crossing the
flying area. Be considerate to farm animals and avoid frightening them.
If flying from a site shared with other airborne 'objects' always be
extra vigilant.
The FUN-Start
Mk2 will take a lot of abuse and should prove an invaluable tool for those
wishing to become an accomplished model pilot. Having successfully, we
hope, assembled and flown the FUN-Start Mk2 why not try one of the more
conventional models in our range. There are over 20 to chose from (we
produce the largest range of everyday slope soarers in the country) and
it is being added to all the time. If you have any comments or suggestions
concerning any of our models or products please do not hesitate to contact
us. We like to hear from our customers.
Happy Landings
Stan Yeo
FunStart Mk2 030514
|